
Anyway, we have been living without baseboard in the living room since before we moved in. The living room was originally carpeted, as you may recall, and when we removed the carpets to work on the hardwood, we took out the baseboards too, since they were about an inch off the new floor level. That is how things stayed for a year and a half, until after some reading and we were on our way!
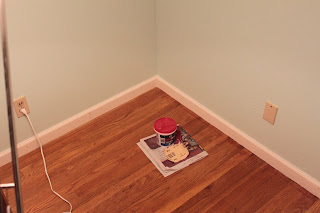
Here is what it looked like for over a year and a half:
 Pretty ugly, right? Notice the huge gap at the bottom of the wall.
Filling is an important part of trim work, at least when you cut wood like I do, and when your house is as warped as this one.
Here is pretty much what the finished product looks like, all clean and white and done!

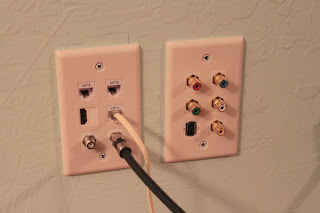
As part of this project, I had to finish wiring our AV plugs behind the TV (shown three cat6, HDMI, two coax, five RCA, and one FireWire)
This project was also the first that young Master House assisted on. Here you see him moving a piece of baseboard used for measuring purposes.

The baseboard we are using is a solid pine, pre-primed from Home Depot. I think that they pre-prime it mostly to hide the crappiness of the wood. You can see the profile in the picture above. We painted it a nice gloss white, which should be easy to clean in the future. The board is sold in nice long lengths (18 feet), but that also makes it exciting to bring home: Anyway, this project is creeping along (we started in August!), held up various other projects and for a while by the lack of a safety key for the table saw. We have the living room and one side of the hallway done. Still have the entry and the kitchen to do, as well as the other side of the hallway.
 Anyway, this project is creeping along (we started in August!), held up various other projects and for a while by the lack of a safety key for the table saw. We have the living room and one side of the hallway done. Still have the entry and the kitchen to do, as well as the other side of the hallway.
Still, the living room is done! That counts for something right?

 On Saturday I ripped out most of the garden, and planted some winter vegetables. We planted garlic, lettuce mix, beets, and snow peas, which were all the "winter" things we had. Still going strong are the tomatoes, sweet potato, and chives. We will see how they end up.


